Sourdough bread has been called a labor of love but if you have access to a good sourdough starter, baking artisan sourdough at home is a whole lot easier than you think!
Sourdough is a process that begins with an active, healthy and mature sourdough starter. This is probably the most important part of sourdough bread. If your starter is strong, you can do great things. But, the sourdough process can take a long time. This is hard for those of us that don’t have a lot of patience!
This recipe for Same Day Sourdough Bread takes some shortcuts. By taking the starter out of the fridge the day before and feeding it, then letting it double overnight and getting the sourdough process started in the morning, you can have a fresh loaf of sourdough by dinnertime the next day.
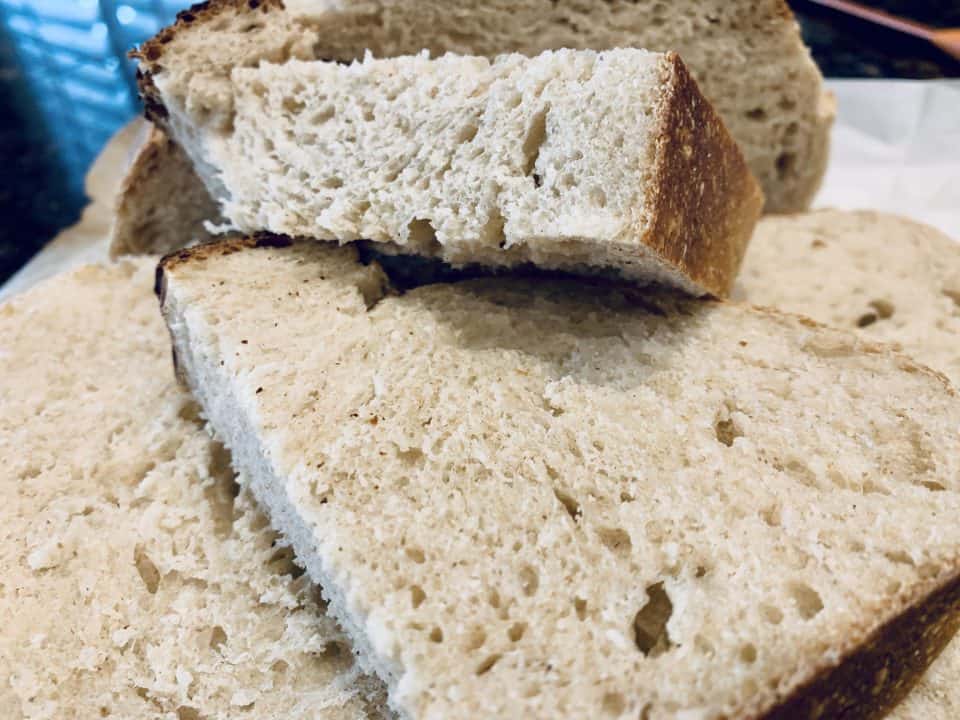
Why make Same Day Sourdough Bread?
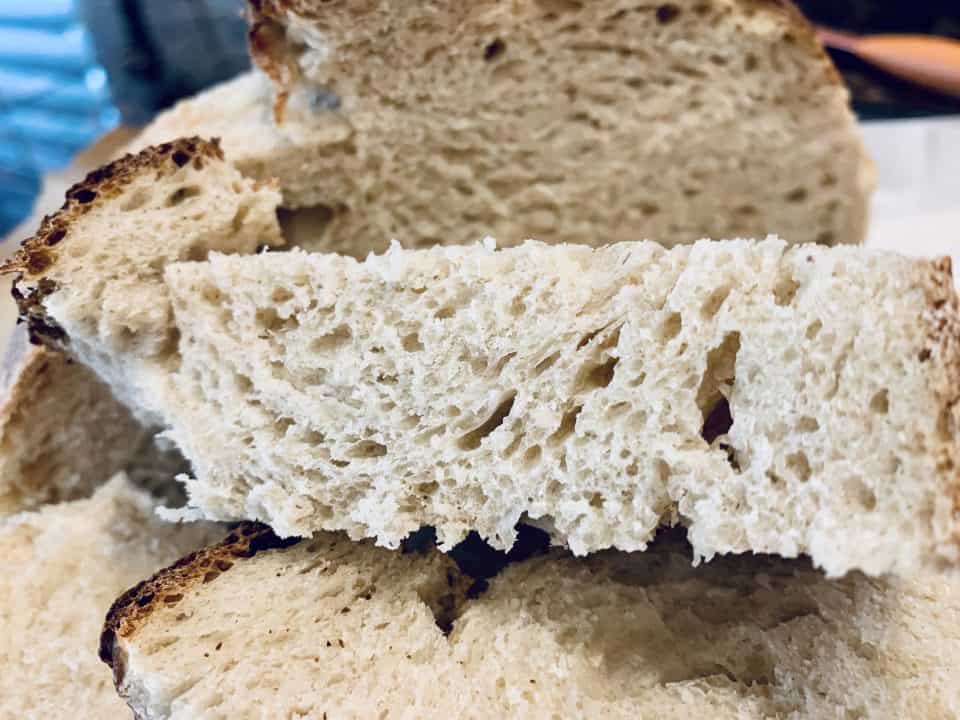
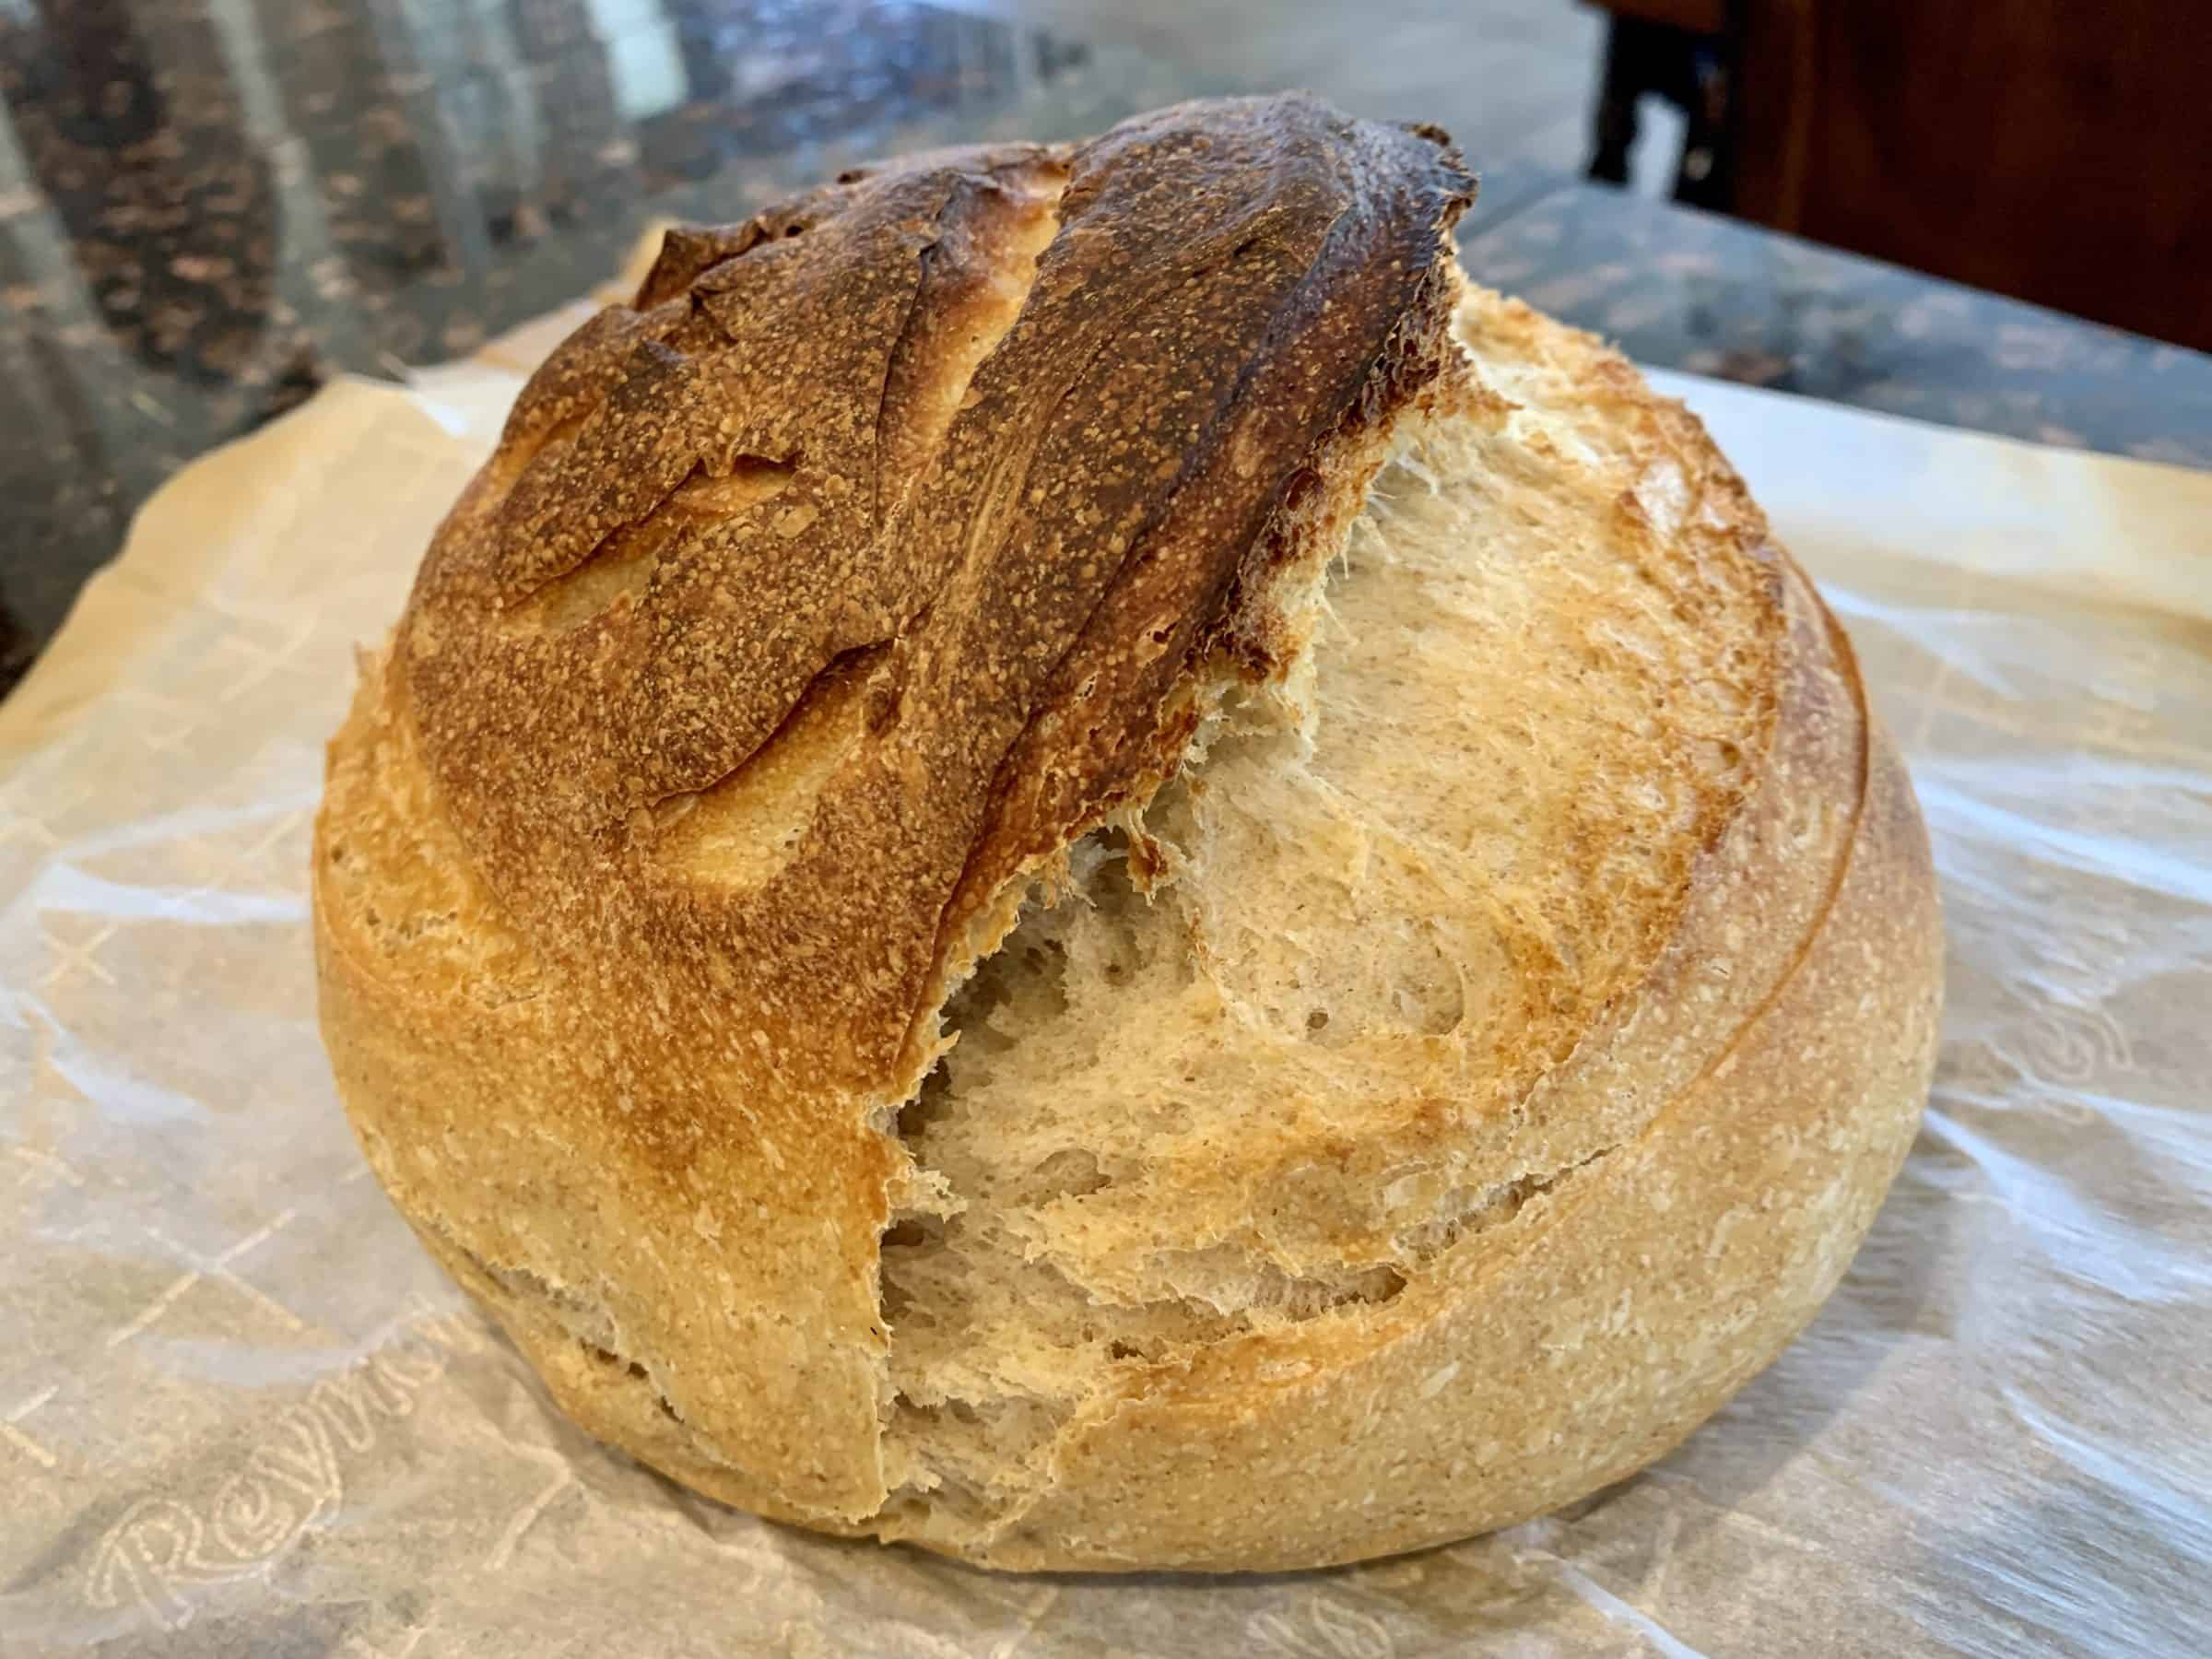
This bread is easy and delicious, offering the tang of sourdough bread without being overly sour. The crust is crispy and delicious and the crumb (the inside) is flavorful and spongy. The business of making sourdough bread is a master skill that can be hard for a lot of at home bakers but this is a great starter recipe for those of us that are still learning.
This recipe doesn’t use any conventional yeast and gives a glimpse of the power of sourdough starter. In other words, it makes the science come to life and shows home bakers how versatile it can be. My friends and family ask me to bake this bread for them all the time and I am happy to oblige as this bread makes me feel like an accomplished baker!
Do I need any Special Equipment?
For this recipe, I use a stand mixer equipped with a dough hook, parchment paper and a small 4.5 quart dutch oven with a cover to bake the bread in. I use an inexpensive metal brownie pan half filled with water on the rack under the dutch oven during baking, and the first few times that I made this recipe I checked to be sure that the bread was cooked all the way through with an instant read thermometer (should read between 205 and 210 degrees F when done).
The dutch oven that I use is not an expensive one and it has gotten pretty stained on the enamel inside just from using it to bake, even with the parchment paper. You can use cast iron if you have it, and it will stain a lot less.
If you want to use a cast iron pan and you don’t have a cover for it just be sure that the water in the pan below the rack you are going to bake on is good and steamy before you put your bread in (preheat + add an additional 10 minutes before putting the bread in to bake or start with boiling water when you preheat).
Spritzing the bread with a light mist of water before baking will also have the same effect as cooking for the first ten minutes with the cover on. There are ways around everything! Don’t be afraid to use a workaround – it is a great way to learn and grow as a home cook.

When is Sourdough Starter ready to use?
Sourdough starter is an established colony of wild yeast that can be used for baking. It adds a more complex flavor and texture and once you have some, you can make literally every baked good that you can think of with it. I built my starter from scratch because I love the science of it but you don’t have to. You can get sourdough starter from all sorts of places, a family member, a friend, a generous bakery… you can even buy it on Amazon.
The thing with starter is that you need to “feed” it to use it. When you feed it, it gets very active and happy and rises to at least double it’s volume like in the picture above. This is what they refer to when they say that you should use it for baking at the time of or just past the “peak”. I feed my starter every time I use it but then immediately move it to the refrigerator so that it does not rise. I mark the level of the amount of starter with an elastic band. For this recipe, I pull the starter out of the fridge when I go to bed so that I can bake with it the next day. By the time I get up and get going, it has doubled and is ready to go.
This recipe calls for about 1/2 cup of active starter (100 grams). My mixture is a ratio of 1:1:1 where I combine 50g of mature starter, 50 g of warm water and 50 g of flour and let it rise for 10-12 hours or until doubled. I use all but 50 grams, leaving me just enough starter left to feed it again and put it back in the fridge until next time.

How to make Same Day Sourdough Bread
This recipe for Same Day Sourdough Bread takes some shortcuts. You’ll need to take the sourdough starter out of the fridge the night before you want to make this bread and feed it and let it double overnight. Then you can begin the process below.
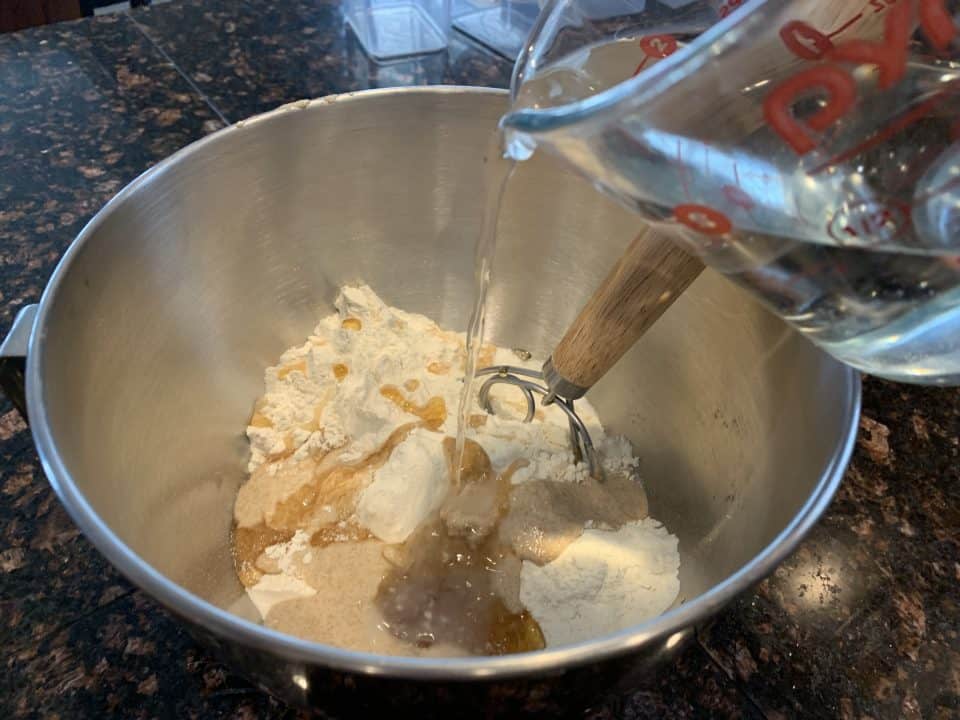
Put the sourdough starter, warm water, salt, honey, and 2 1/2 cups of bread flour (400 grams) into the bowl of a stand mixer. Set the remaining 1/2 cup (40 grams) of bread flour aside.
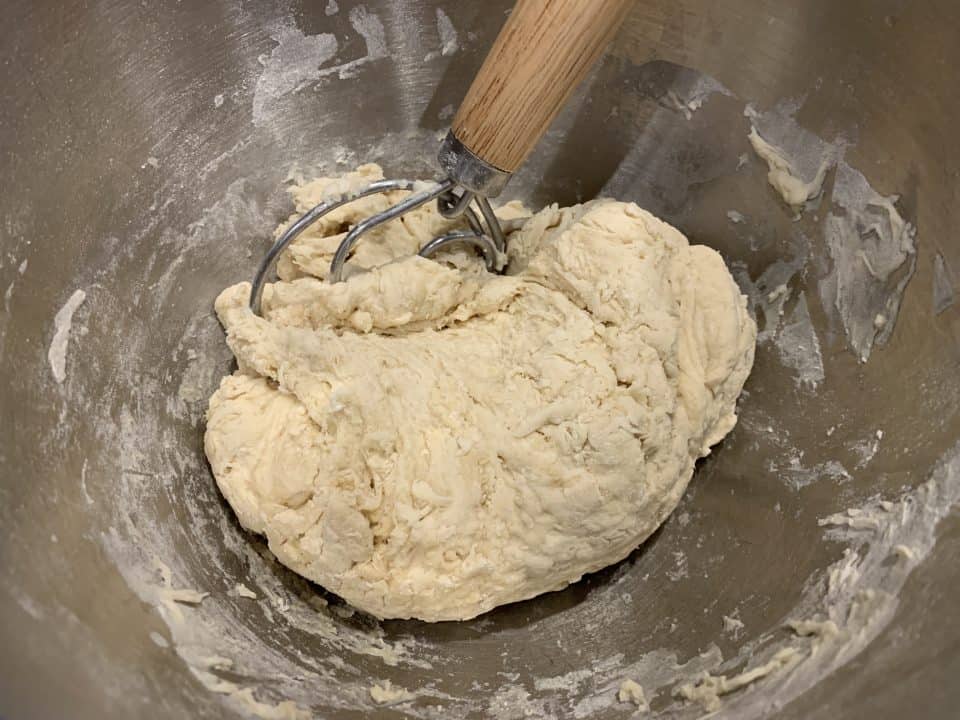
Using a spoon, roughly mix the contents of the bowl just until it comes together into a shaggy dough. I use a Danish dough whisk. I like it because nothing sticks to it. They aren’t very expensive on Amazon but you do not need to use one unless you want to. Once the dough has just come together, let it rest for 15 minutes.
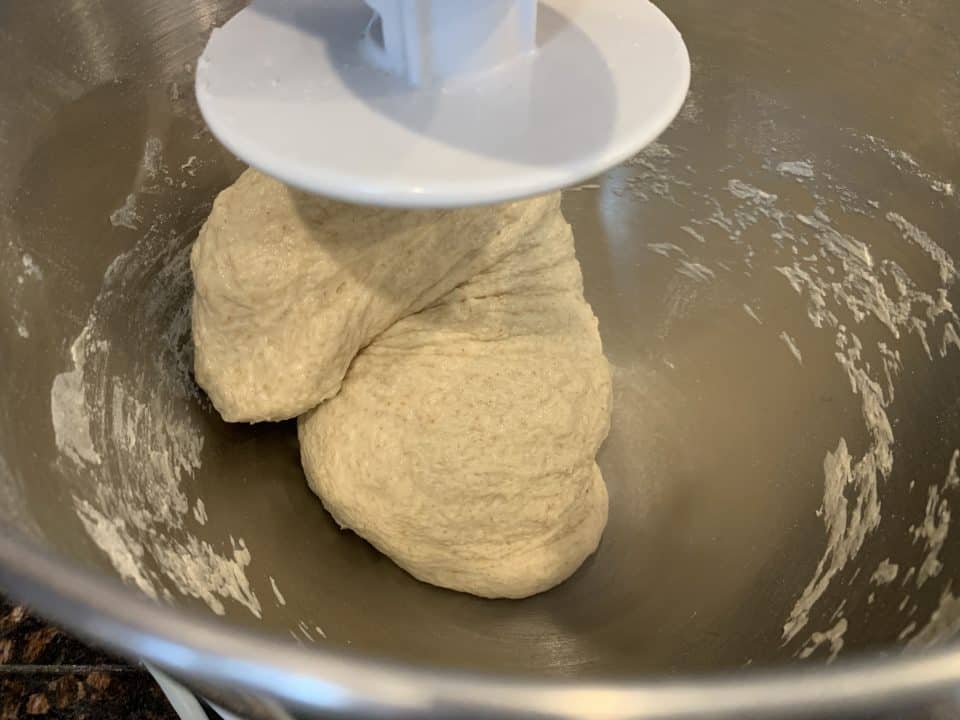
Then, using a dough hook, mix the dough in the stand mixer for 5 minutes, slowly adding the last 1/2 cup (75 grams) of bread flour.

While the dough is being kneaded, lightly grease a medium bowl with cooking spray. Using lightly floured hands, remove the dough from the hook and shape into a ball. Place into the greased bowl and cover with plastic wrap.
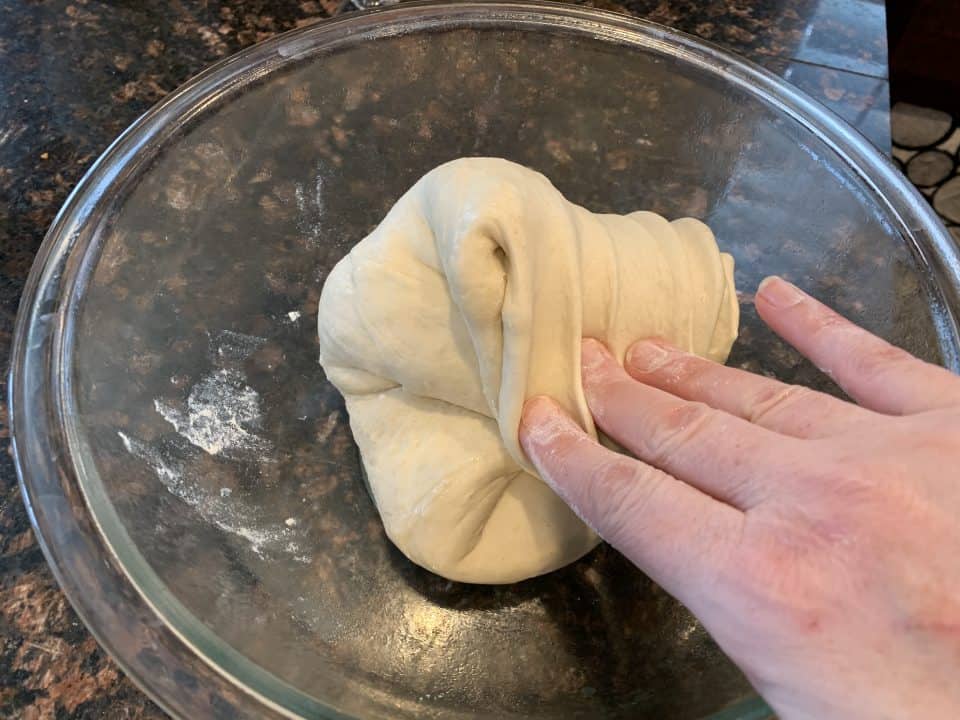
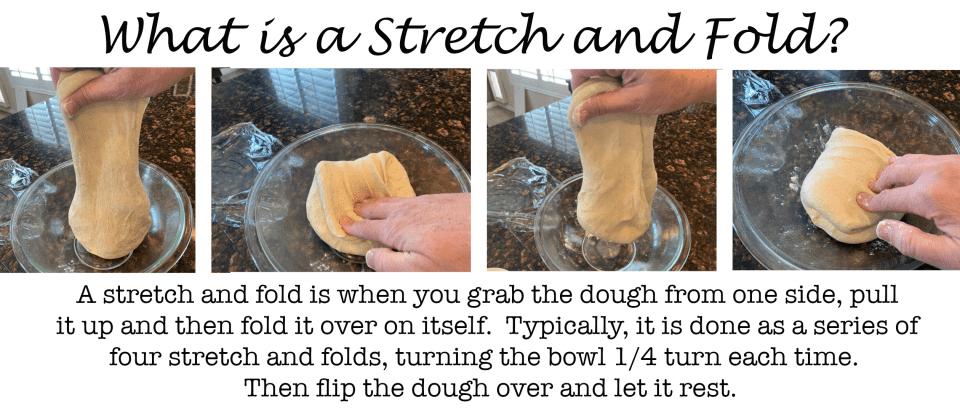
Allow to rise for three hours in a warm place, performing a set of stretch and folds after each hour has passed. Wait – WHAT? You might be wondering what the heck a stretch and fold is. Let me show you!

After the third stretch and fold, place the dough onto a piece of parchment paper and place inside of a small dutch oven. Allow to rise one final hour.
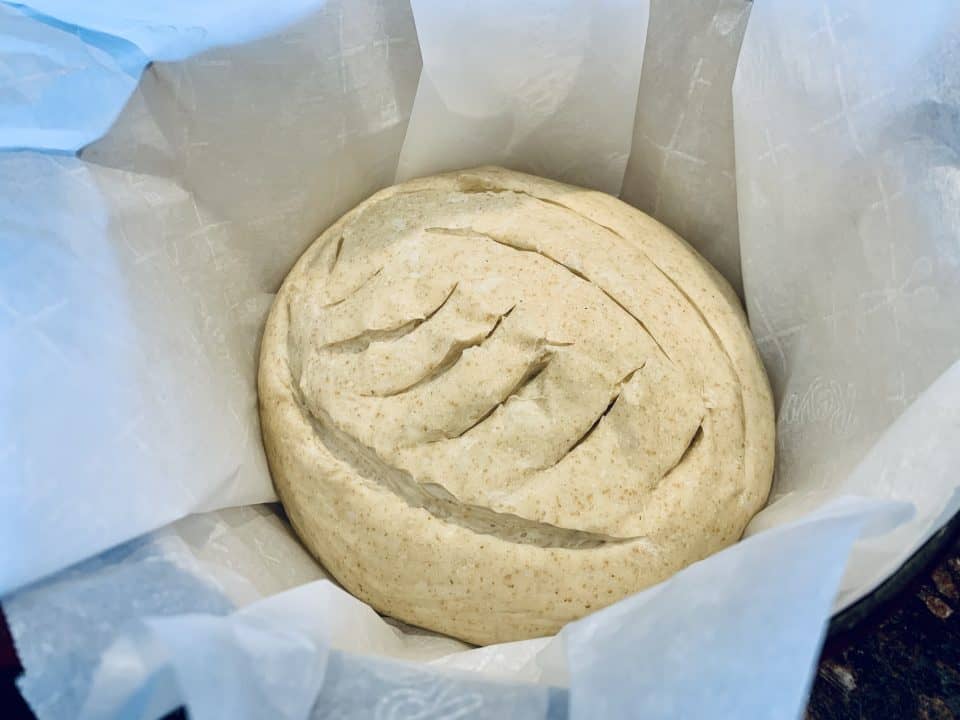
After the final rise, score the dough using a sharp knife or a bread lame. Do it like you mean it. The first time I did it I was afraid of deflating the bread but this is Sourdough bread and it needs deeper cuts to allow for “oven spring” which is the rising it does while baking.
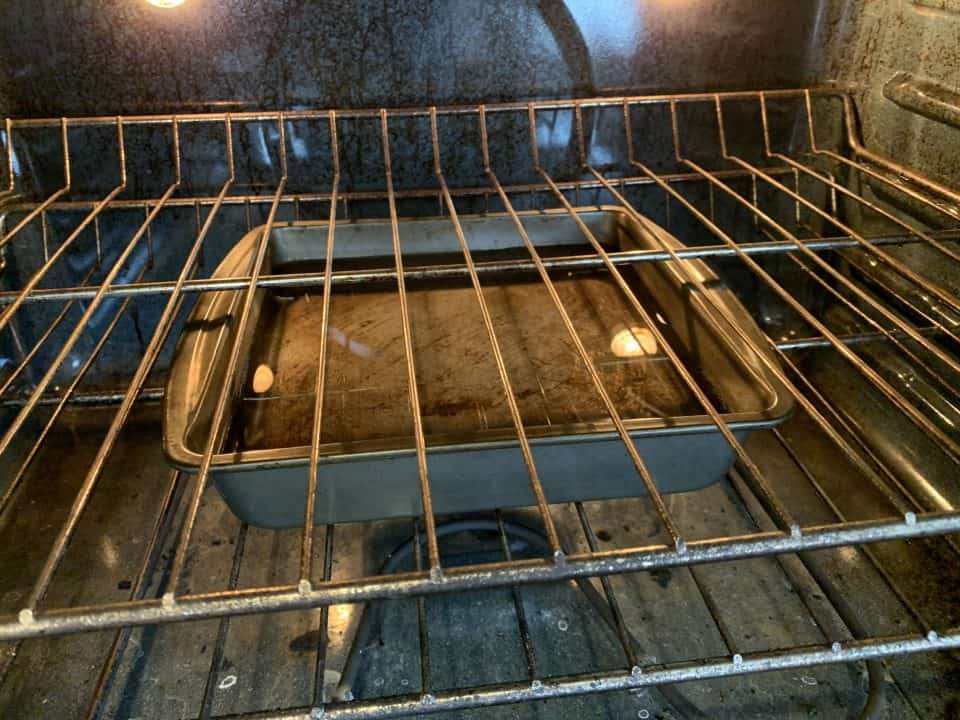
Fill a small oven proof container halfway with water. Place onto the lowest oven rack and preheat the oven to 450 degrees F. The steam from this water will help your bread to have a crispier (but not hard) crust.
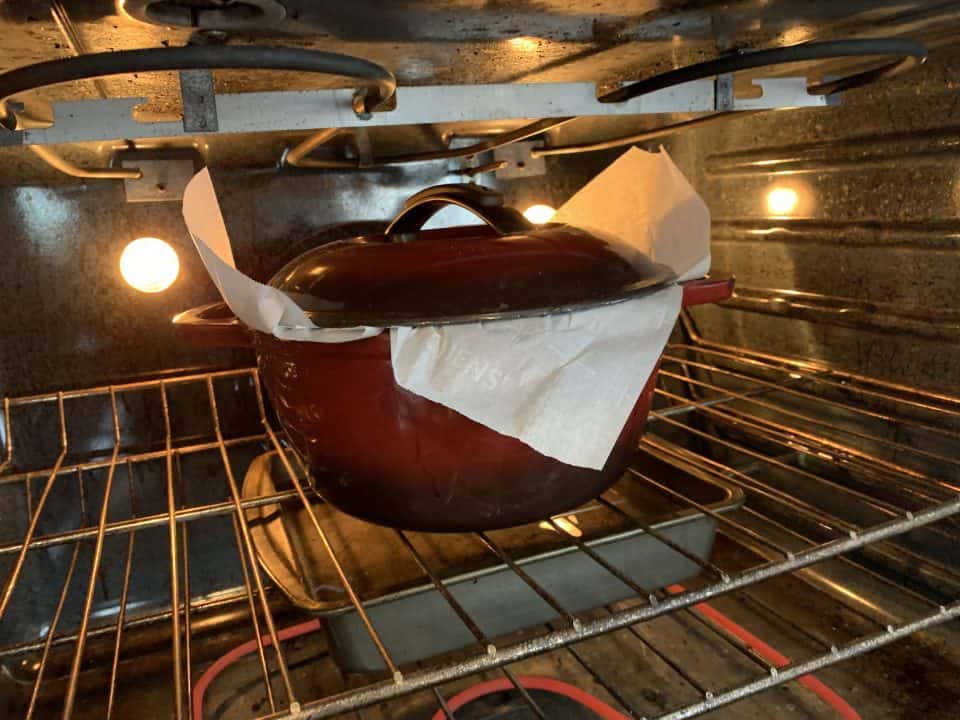
Once preheated, cover the dutch oven with the lid and bake for 10 minutes. The bread will rise slightly in the first ten minutes with the lid on.
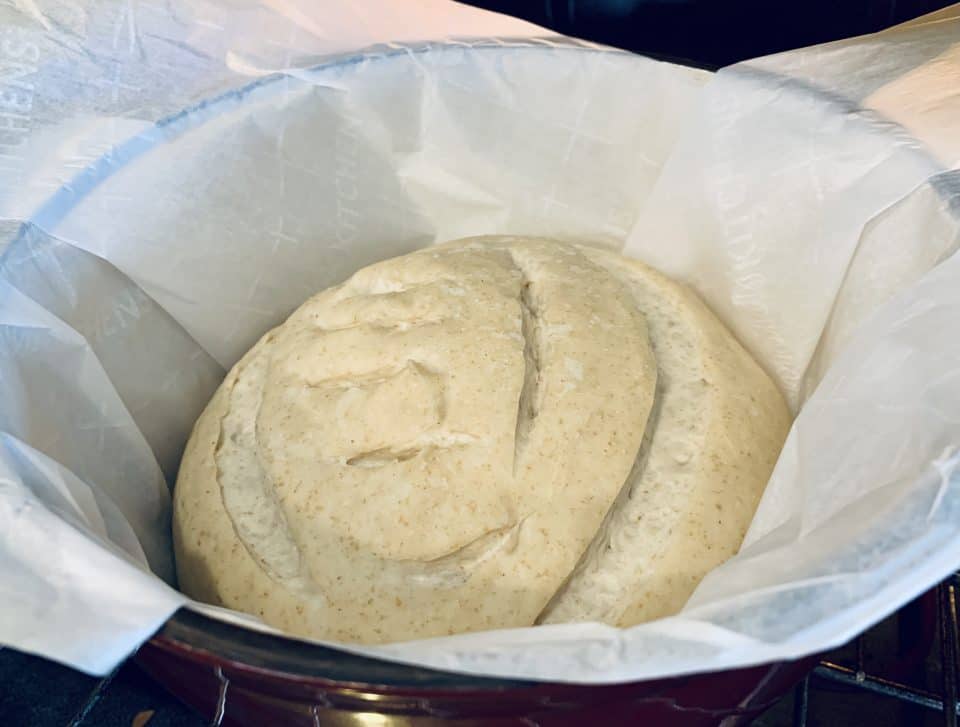
Remove the lid and bake for an additional 30 minutes until the bread has risen and the crust has become golden brown.
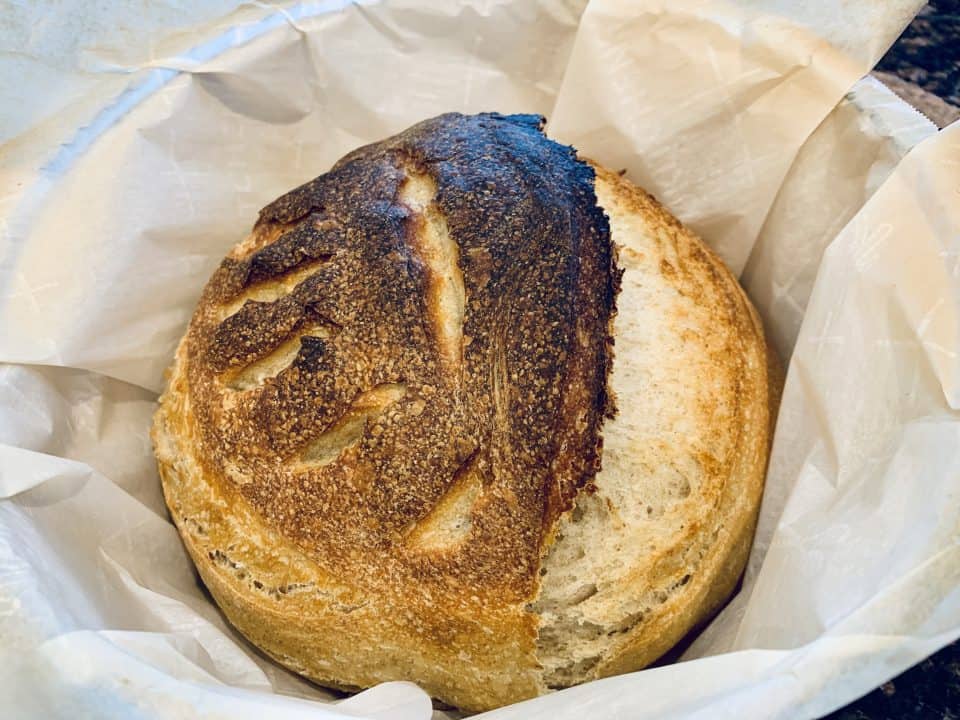
Remove from the dutch oven and cool on a wire rack for at least 45 minutes before slicing. If you cut the bread too early, the crumb (inside of the bread) will be gummy. Let it cool before you cut. It is worth the wait!
Serve immediately. Store at room temperature for up to three days. Enjoy!
some other bread recipes you may like
Jalapeno Cheddar Focaccia Bread – Flavorful Italian inspired bread gets kicked up a notch with the addition of cheddar cheese and spicy jalapenos. The perfect combination of yum.
Parker House Dinner Rolls – A family favorite for special occasions these also make great slider buns and little sandwiches.
Cheddar-Dill Dutch Oven Bread – Easy to make bread with a great texture and a complex flavor.
No Fail Pizza Dough – Simple and delicious – great in the oven or on the grill, just add your favorite fixins!
Rustic Dutch Oven Bread – Five pantry ingredients come together in this easy to make crusty bread, a delicious addition to homemade soup or chili.


Same Day Sourdough Bread
Equipment
- Stand mixer equipped with a dough hook.
- Parchment Paper
- Small 4.5 quart dutch oven.
- Oven proof pan for water (for the rack under the dutch oven).
- Instant read thermometer (OPTIONAL – not necessary).
Ingredients
- 1/2 cup mature sourdough starter, at peak 100 grams
- 1 cup water, warm (105 – 115 degrees) 245 grams
- 1 tsp salt 7 grams
- 1 tbsp honey 22 grams
- 3 cups bread flour, divided 375 grams
- cooking spray
Instructions
- Put the sourdough starter, warm water, salt, honey, and 2 1/2 cups of bread flour (butter 300 grams) into the bowl of a stand mixer. Set the remaining 1/2 cup (40 grams) of bread flour aside.
- Using a spoon, roughly mix the contents of the bowl just until it comes together into a shaggy dough. Let it rest for 15 minutes.
- Using a dough hook, mix the dough in the stand mixer for 5 minutes, slowly adding the last 1/2 cup (75 grams) of bread flour.
- While the dough is being kneaded, lightly grease a medium bowl with cooking spray. Using lightly floured hands, remove the dough from the hook and shape into a ball. Place into the greased bowl and cover with plastic wrap.
- Allow to rise for three hours in a warm place, performing a set of stretch and folds after each hour has passed.
- After the third stretch and fold, place the dough onto a piece of parchment paper and place inside of a small dutch oven. Allow to rise one final hour.
- After the final rise, score the dough using a sharp knife or a bread lame.
- Fill a small oven proof container halfway with water. Place onto the lowest oven rack and preheat the oven to 450 degrees F.
- Once preheated, cover the dutch oven with the lid and bake for 10 minutes. Bread will rise slightly.
- Remove the lid and bake for an additional 30 minutes until golden brown.
- Remove from the dutch oven and cool on a wire rack for at least 45 minutes before slicing.
- Serve immediately. Store at room temperature for up to three days. Enjoy!
Nutrition *
* The information shown is an estimate provided by an online nutrition calculator.


Peggy says
This was my first time making Sourdough Bread, I spent hours looking for the perfect and easiest recipe with instructions that were easisly understand, this one was the winner. I can’t say enough good about this recipe, my bread turned out perfect my first try and the taste was delicious. If you are new to making Sourdough Bread, try this recipe, it is amazing! Thank you for sharing this one with us!
Michelle Mundy says
So happy to hear that Peggy! Thanks so much for the wonderful comment! 🙂
Kat says
So easy and so good!!!
Michelle Mundy says
So happy to hear Kat! 🙂
Kat says
Step 1 says to reserve 1/4 cup flour, step 3 says to add in 1/2 cup flour. Which is correct?
Michelle Mundy says
Hi Kat! Apologies for that typo and thank you so much for pointing it out! In Step 1, add 2 1/2 cups of flour, reserving 1/2 cup of flour. Then in the next step, add the remaining flour. So sorry for the confusion. I have corrected it in the recipe card and the post and appreciate you bringing it to our attention. 🙂
Dana says
While mixing in the kitchenaide, I had to add a ittle water bc it was too floury and wasn’t sticking well. And now, with the stretch and fold, it doesn’t look like your photos and it doesn’t stretch real well, but I am folding. Any suggestions? Should I let it rise longer?
Liz says
Mine turned out flatter than I expected. I did have to use my 6.5 dutch oven.
Michelle Mundy says
I have found that if you use a smaller container, the bread will rise up rather than spreading out. I hope it tasted good! <3
Julie Kendall says
My loaf turned out dense and did not rise much. Flavor was okay; made good toast.
Michelle Mundy says
Hi Julie! So sorry to hear that your bread did not rise much. Every starter is different and every environment is different as well. I am glad to hear that the flavor was good. If you try again, maybe let the rise determine when you bake – don’t bake it until it has risen to where you are happy with it. Sourdough can be finicky but it is awfully fun to play with it! Happy Cooking! 🙂
Stella Surest says
This was a great recipe and I’m so excited to bake my first loaf of sourdough! I have a few questions though. I don’t have a Dutch oven; I used a glass bread pan. Can you offer modified instructions on how to bake? Do I just combine the bake time and bake for 40 minutes? Additionally, I do not have a kitchen aid mixer with a dough attachment. I kneaded this all by hand. It worked great! I was wondering if you have any information or advice for those without stand mixers and Dutch ovens.
The Bandit says
Hi Stella! I will admit that I really use the stand mixer only out of convenience. I know my Grandmother did not have a stand mixer and her hand kneaded bread was amazing. I realize it is a lot more work though so kudos to you! Recently, I have started cooking sandwich sourdough loaves and cinnamon raisin sourdough for my son and these are cooked in a glass or metal loaf pan. When I do them this way I reduce the heat to 400 degrees and cook for about 40 minutes or until golden brown. I don’t include the pan of water in the oven at all for sandwich loaves. Hope this is helpful!
Marla says
I love this recipe! I’m new to making sourdough and this has been the simplest, most reliable recipe I’ve found so far! The ease of this recipe has helped build my confidence in my baking skills. I’ve been experimenting and tweaking some things such as omitting the honey and proofing in the fridge overnight when I’m wanting a different flavor profile. Bravo 👏
Vivian Williams says
What is your technique for making your starter from scratch?
The Bandit says
Hi Vivian. I have one starter that I inherited from a friend and another that I created by following the steps at King Arthur Flour. It has been fun to play with them both and try different things as they are so different!